The exterior of a home is more than just a protective shell—it sets the tone for curb appeal, energy efficiency, and long-term durability. One of the most effective ways to enhance both appearance and protection is through quality siding. Whether you are building new, remodeling, or replacing old materials, siding can dramatically transform the look and performance of your property.
This article explores the importance of siding, the types available, and the benefits of proper installation and maintenance.
Why Siding Is Essential
Siding is one of the first defenses a home has against harsh weather conditions. It shields the structure from rain, wind, and extreme temperatures while providing insulation and style. Without proper siding, homes risk moisture damage, higher energy costs, and reduced property value.
Key reasons siding matters include:
- Protection against the elements – Keeps moisture out, preventing mold, rot, and structural damage.
- Energy efficiency – Helps regulate indoor temperature and reduces energy costs.
- Aesthetic appeal – Enhances the look of your home with endless colors and textures.
- Durability – High-quality siding materials can last decades with proper care.
- Increased property value – Attractive, well-maintained siding boosts curb appeal and resale potential.
Popular Types of Siding
Choosing the right siding depends on your budget, maintenance preferences, and design goals. Here are the most common options:
Vinyl Siding
Vinyl siding is widely chosen because of its affordability, low maintenance, and wide selection of colors and styles. It is resistant to rot and pests but may crack in extreme weather if not properly installed.
Wood Siding
Wood siding gives homes a timeless, natural appearance. Available in clapboard, shingles, or shakes, it offers a warm aesthetic. However, it requires regular painting, staining, and maintenance to protect against rot and insects.
Fiber Cement Siding
Fiber cement siding is durable and versatile, often designed to mimic wood, stone, or brick. It resists fire, pests, and moisture while offering long-lasting performance. Though more costly upfront, it pays off in longevity and low maintenance.
Metal Siding
Aluminum and steel siding provide strength and resilience. Popular for modern designs, metal siding is resistant to fire, insects, and rot. It is also recyclable, making it an eco-friendly choice.
Brick and Stone Veneer
Brick and stone veneers provide a premium, elegant finish. While heavier and more expensive than other materials, they deliver unmatched durability and timeless appeal.
Benefits of Installing New Siding
Upgrading or replacing siding offers many advantages:
- Enhanced curb appeal – Fresh siding instantly modernizes the look of your home.
- Better insulation – New siding materials often come with improved thermal protection.
- Lower maintenance – Modern siding options are designed to resist fading, cracking, and warping.
- Extended durability – Protects your home’s structure from long-term weather damage.
- Higher resale value – Updated exteriors are a strong selling point for buyers.
Signs It’s Time to Replace Your Siding
Old or damaged siding can affect not just your home’s appearance but also its safety and efficiency. Common warning signs include:
- Cracked, warped, or loose panels.
- Mold, mildew, or rot on surfaces.
- Rising energy bills due to poor insulation.
- Peeling paint or fading color.
- Visible water damage inside the home.
If you notice these issues, replacing siding may save you from costly repairs down the road.
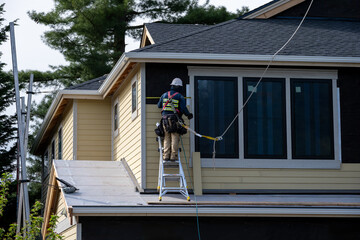
Professional Installation vs DIY
While some homeowners may consider siding installation a DIY project, professional installation is highly recommended. Proper installation ensures panels are fitted securely and sealed against moisture. Professionals also understand building codes, safety practices, and the best techniques to maximize energy efficiency.
DIY may seem cost-effective, but mistakes can lead to water damage, reduced lifespan, or expensive repairs. A professional installation guarantees long-term performance and peace of mind.
Tips for Maintaining Siding
Once installed, siding requires care to preserve its beauty and functionality. Regular maintenance ensures you get the most out of your investment.
- Clean annually – Use a garden hose or pressure washer on a gentle setting to remove dirt and grime.
- Inspect for damage – Look for cracks, gaps, or warping after storms or seasonal changes.
- Repaint or reseal when needed – Wood siding especially requires routine painting or staining.
- Trim landscaping – Keep trees and shrubs from touching siding to avoid scratches and moisture buildup.
- Check caulking – Seal gaps around windows and doors to prevent leaks.
With simple upkeep, siding can maintain its protective and aesthetic qualities for many years.
Choosing the Best Siding for Your Home
When deciding on siding, balance functionality and appearance. Consider these factors:
- Climate – Choose siding that holds up against local weather conditions.
- Budget – Factor in both initial costs and long-term maintenance.
- Aesthetics – Match the siding style and color with your home’s architecture.
- Maintenance level – Decide how much time you’re willing to spend on upkeep.
- Longevity – Some siding types last longer and require fewer replacements.
Siding is more than just an exterior covering—it’s an essential investment in your home’s beauty, efficiency, and protection. With options ranging from vinyl and wood to fiber cement and metal, there’s a style and material for every homeowner.
By choosing the right siding and maintaining it properly, you can protect your property, lower energy costs, and enjoy lasting curb appeal. Whether you’re upgrading an older home or finishing a new build, siding is one of the smartest improvements you can make for long-term value and comfort.